How Do Punch Down Tools Work for Network Cabling?
August 24, 2022

Punch down tools play an essential role in network cabling and installations.
Reliability and smooth network performance are key to a well-functioning communication system. But behind a successful connection, network technicians are on the job – with the right tools at hand.
Among the essential equipment for running a smooth network is punch down tools. A must-have item in cable installations and for stepping up cabling work efficiency.
In this post, we will define what punch down tools are, how they work, and how to use them effectively.
Punch Down Tools Explained
Punch down tools allow for quick and effective cross-connection of wires. The “punch down” term comes from punching a wire into place using an impact action.
For instance, through the use of 66-type or 110-type connection blocks. They are ideal for installing wiring for telephone, computer, and audio networks.
Also known as the krone tool, this device is a necessity for telecom and data network technicians. Moreover, they come in handy for termination works in a copper network.
For example, terminating Ethernet cables, like Cat5, 5E, 6, and 6a. The tool is used for inserting the cable wires into the insulation-displacement connectors (IDC) on the following:
- Punch down blocks
- Path panels
- Keystone modules
- Surface mount boxes
As mentioned, the name is derived from the tool’s method of pushing a solid copper wire. It then cuts off the excess by punching the tool and driving the blade through the wire.
Simply put, it works by inserting the wire for a corrosion-resistant termination and trimming off excess wire. This ensures fast and precise connections with less effort.
How to Use Punch Down Tools
When you need cable repairs and installation, cutting and securing wires is important. But the work in progress can be a bit different when exposed wiring is present. It can become tricky and dangerous and may even cause your connections to short out.
This is where punch down tools come in. Using one ensures your wires are secure, as well as helps you trim and contain them in a basic jack.
Then how to use it? There are six basic steps – check them below for reference.
Step 1: Strip back the cable jacket
Always leave about 6cm (2.5 inches) at the end of the cable. Insert the cable into a modular crimping tool or any cable stripping tool, and spin it around a few times.
Remove the jacket; strip back the cable to expose enough of the cable so that you can separate the jacket and the cable.
Step 2: Expose the wires
After removing the cable jacket, you should have a few inches of exposed cable. Gently pull away from the wire pairs from the cable centre, so they fan out.
Twist in a counterclockwise motion to separate the wire pairs. Aim to straighten the ends as much as you can, allowing for easy termination.
Step 3: Place the cable wires in the jack
Next is to take off the top protective cover of the jack and set the cable into its block. Insert each wire into its own separate slot to ensure the wire matches the A or B configuration.
The conductor wires should extend out of the jack.
Step 4: Terminate the conductor wires
Press your punch down tool down on the conductor wires to cut them. Punch straight down and not at an angle to prevent the jack from bending.
The angled (cut) part of the blade should contact the long sturdy side of the jack. This will make sure the cut wires are flush with the jack.
Step 5: Inspect the wires
Ensure there is no overhang out the side of the jack. Plus, the edge of the cable jacket should be near the base of the jack and the wires you just cut off.
If any wires are sticking out, carefully trim them with a wire cutter so that they are flush with the jack.
Step 6: Place a dust cap on the jack.
Snap the dust cap in place to protect the wires, keep the connection secure, and prevent strain. You can pop off the dust cap using a flat-head screwdriver inserted into the indentation on the side.
Inability to set the dust caps back on the jack indicates that your wires may not be seated correctly. If so, recheck the wires and see to it they are secured and trimmed.
Punch Down Tools Common Features
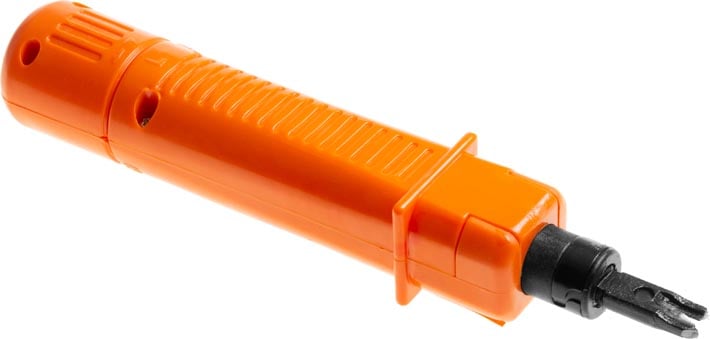
A typical punch down tool is usually 15-20 centimeters long with a blade at one end and also consists of the following:
- A handle
- An internal spring mechanism
- Removable slotted blade
The top and bottom of the tool come in different colours for easy labeling. This way, you will know which side to use to cut the wire. Most models also have a changeable blade and a pressure adjustment screw or knob.
When it comes to the dimension of the tool, it is not standardised. The weights also vary, but whatever the dimensions you get, usage is just the same. Note: The right dimension and weight depend on the application and how comfortable you are holding the tool.
Blade Types
To accommodate various connector types, punch down tools have different blade types:
- 66 blade
- 110 blade
66 punch down block
The 66 block type connects sets of wires in a telephone system. It comes in three sizes: A, B and M.
The A and B have six clips in each row, while M has only 4. Each row of a 66 block is set up for one pair of wires to be spliced into another pair. But any pair of clips can be used to connect any two wires.
The A blocks spaced the rows further apart and have been out of date for many years. While B is used in panel distribution where destinations need to connect to the same source. The M blocks, in contrast, are often used to connect a single instrument, such as a distribution block.
Moreover, 66 blocks are designed to terminate 22 through 26 AWG solid copper wire. They can be assembled with an RJ-21 female connector and a 25-pair cable with a male end for quick connection.
110 punch down block
The 110-punch-down block is the updated version of its 66-block counterpart. Further, it is the core part of the connection management system.
The 110 blocks connect wiring for telephone systems, data networks, and other low-voltage applications. It is flame-retardant and features injection-moulded plastic and a termination cabling system.
Designed for 22 through 26 gauge solid wire, which is the termination used:
- Cat5e patch panel
- Cat 6 patch panel
- RJ-45 jacks
Ideal use for 500 MHz (1 gb/s) or greater bandwidth and compatible with AES/EBU digital audio (greater than 268 kHz). It also uses easy quick-fit plug-hop loops, which can be simply rearranged.
Get Your Punch Down Tools Here!

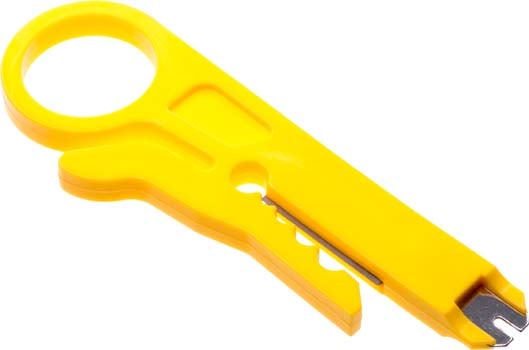
Punch Down Tool
Product code: TL0038
This small and versatile punch down tool can strip wire up to 5-6mm. Even better, it doubles as a punch down tool for 110/88-type terminals with a blade.
Made from polyresin plastic with steel cutters. It could easily fit in the pocket or tool kit.

CAT5 Punchdown Tool Blade
Product code: TL0042
Made from hardened SNCM-21, this unit is changeable and reversible. It can be changed by hand, so a screwdriver is not necessary.
One end of each blade has a cutter for that extra-neat termination. The other end is plain for those linked blocks. Blade retaining pressure within 4-6 kg.

CAT5 Punch Down Tool (Requires Blade – TL0042)
Product code: TL0041
This punch down tool can terminate 110 series jacks, but it needs a TL0042 blade to terminate Cat5. Perfect for seating wire into terminal blocks or to cut off wire end after termination.

Pro’s Kit Punchdown Tool Krone Type
Product code: TL1603
The Pro’s Kit Punchdown Tool Krone Type is used for seating wire into KRONE® and 110-style terminal blocks. It meets all industry requirements.
It features a rigid handle made of ABS, and it has a built-in wire removal finger.
The Bottom Line
Punch down tools are convenient network tools, making wire termination a lot easier. If your job or task involves cable installations, it is always best to have one in your toolbox.
Overall, using one can greatly accelerate your cabling work efficiency. Invest in one to enjoy this promising benefit!
© Wiltronics Research Pty Ltd 2022
Write a Comment
You must be logged in to post a comment.