Satellite Finder Explained: What Is It and How to Use One
June 22, 2021
A Satellite finder sounds like a cool device, but what is it for? How can it make a difference to your dish antenna?
You’re seated on your couch with a can of soft drink on the right and a bowl of popcorn on the left. A minute left before your favourite TV series starts.
Ten seconds remaining and the current channel suddenly shifts to another satellite. What a bummer!—but not when you have a satellite finder.
In this article, we will cover everything you need to know about satellite finders. This includes how they work, their different varieties, as well as how you can use one at home.
What Is a Satellite Finder?
As the name suggests, a satellite finder is a handheld device designed to locate or tune television satellites. It’s also known as a satellite director or dish pointer.
Satellite finders are particularly helpful when you’re looking to get a better dish signal.
How does it work?
A satellite finder works by measuring the signal strength of various satellites in geostationary orbit. That way, you can align your dish in the right direction and get a strong signal for TV reception.
It’s simple and convenient to use. Thanks to its portability, you can bring it on the roof while you’re at the satellite dish.
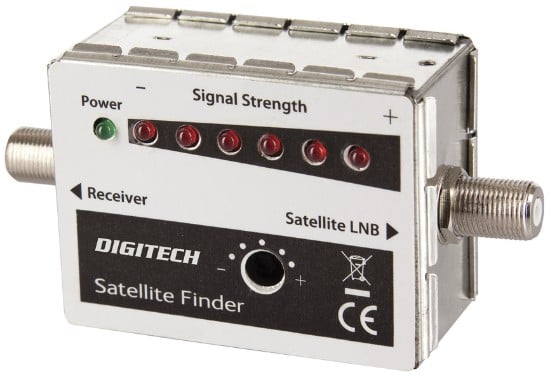
This also means you don’t have to check your signal strength on your television set. Most devices come with LED displays for measuring the maximum signal strength.
Types of Satellite Finder
There are two types of satellite finder available, and these are analogue and digital.
An analogue satellite finder is a passive electronic device, which requires external power to operate. This external power is provided by the satellite receiver.
A satellite receiver is a device that receives and decodes radio signals suitable for TV viewing over the air.
Analogue satellite finders are an economic, durable, and traditional way of tuning satellites. The analogue display is easy to read—paired with an audible tone.
What’s more, there’s no need for batteries as it’s powered by the receiver.
A digital satellite finder, in contrast, is an active device. Unlike its analogue counterpart, it doesn’t need external power to work.
Most models are microprocessor controlled, making them reliable and accurate. The signal strength is graphically shown on the LCD in the form of a thermometer scale or in numbers.
Digital satellite finders can also present pitch tones on a buzzer. The higher the tone, the better the signal.
They have the same connectivity as analogue, but they’re more expensive. This connectivity is via RF connectors: one for the dish antenna and one for the satellite receiver (IRD).
How to Use a Satellite Finder?
Tuning in satellites can be a bit tricky and technical. You need to tune two angles: firs the Azimuth Angle, then the Elevation Angle.
The Azimuth Angle represents the left-right movement of the dish. While the Elevation Angle represents the dish’s up and down movement.
For easy and proper tuning, Headend INFO recommends to set left-right first, then set the up and down position of your satellite.
Here’s a step by step guide on how to tune a satellite using your satellite finder:
- Step 1: Connect the dish to your satellite finder. Do this by connecting a coaxial cable from the LNB (low noise block downconverter) to your satellite finder.
- Step 2: Connect a coaxial cable from the satellite receiver to the coaxial port of the satellite meter. This port gets the power input from satellite power and gives the signal to the satellite receiver.
- Step 3: Power satellite receiver. Then tune your meter’s pointer to number 2 using the round button on the satellite meter.
- Step 4: Ensure the dish is loosened and moveable. You’ll be adjusting the dish in the next steps, so you better loosen the nuts that keep it steady. It’s important that you can move it on the horizontal and vertical axes respectively (azimuth and elevation).
- Step 5: Move your dish antenna left-right to tune. When your satellite meter starts to beep, it means it receives the signal from the satellite.
- Step 6: Keep tuning the dish until you hear continuous beeping/ All LEDs are lit. Then begin moving your dish along the horizontal (azimuth) axis by following your satellite finder’s direction. Do this until the finder measures the maximum signal strength.
- Step 7: If it didn’t work on the horizontal axis, move the dish on the vertical axis. Repeat the previous step but in the elevation angle. Once again, move the dish until the satellite finder reads maximum signal strength.
Note: This can shift from 2 dB to 3 dB or 4 dB to 5 dB, but try to fix it on 5 dB as much as possible. - Step 8: When it reaches nearby 5 dB, lock your dish in place. Once you’ve achieved maximum signal strength, tighten the nuts on your dish to lock in place. You should now have an excellent satellite signal.
Note: A continuous loud beep or fully lit LEDs, as well as the pointer’s right side position (high dB), defines the fine-tuning of the satellite. This results in strong satellite signals.
The Bottom Line
Satellite finders are inexpensive devices that work wonders in setting up satellite dishes and finding the best signal. If you don’t know the offset angle of your satellite dish, investing in a satellite finder can be your best option.
Where To Buy a Satellite Finder?
There are tons of satellite finders you can find online. But if you’re looking for an affordable yet great quality model, then look no further than the Satellite Signal Finder Meter with LED Display (no longer available).
This handheld satellite finder (JLS3302) is reliable and accurate. The meter connected between the satellite dish and the set-top box shows signal strength on the 6 LED.
Once the meter picks up a signal, use the adjustable sensitivity to fine-tune the angle and lock in on the signal. Designed with a small compass, tuning a satellite is a lot easier and quicker.
This model is perfect for setting up permanent dishes as well as portable systems on caravans or RVs.
© Electrotech Brands Pty Ltd 2021
Write a Comment
You must be logged in to post a comment.
How do the satfinders determine signal strength? Does it decode the rf or just rectify any rf on the cable? Do they use the level of the DC voltage on the cable?
The JLS3302 Satellite Finder with LED display works by measuring the RF signal strength from the satellite dish’s LNB and displaying it on a 6-LED panel. It doesn’t decode the signal but instead rectifies the RF signal into a DC voltage, which is shown as relative signal strength. The device is connected between the satellite dish and the receiver, powered by the receiver’s DC voltage (13-18V). You can adjust sensitivity to fine-tune alignment, making it ideal for setting up dishes for both permanent and portable systems.
Longer response:
Satellite finders determine signal strength by measuring the power of the RF signal coming from the satellite dish’s LNB (Low Noise Block downconverter).
Here’s a breakdown of the main components involved:
1. Rectifying RF Signal: Most basic satellite finders don’t actually decode the RF signal. Instead, they rectify (convert) the high-frequency RF signal into a DC signal, which can then be measured as a proxy for signal strength. The stronger the RF signal, the higher the rectified DC voltage.
2. Measuring Signal Power: The satellite finder uses this rectified DC voltage to display the relative power level of the incoming RF signal. The JLS3302 Satellite Finder uses a rows of LEDs to indicate signal strength, Some other meters display this on a needle gauge, a digital readout, or provide an audible tone that changes with signal strength. This method is simple and works effectively for aligning the dish, even though it doesn’t provide detailed information about the content or quality of the signal.
3. DC Voltage for Powering the LNB: The coaxial cable also carries DC voltage (typically 13V to 18V) from the satellite receiver to power the LNB. The satellite finder taps into this power for its operation but doesn’t generally use the voltage level to assess signal strength directly. However, some advanced models can measure or display the voltage being sent to the LNB to verify proper power is being supplied.
Summary:
Basic satellite finders rectify any RF signal on the cable to a DC level and measure its power to display signal strength.
They do not decode the RF signal or use the DC voltage on the cable to determine signal strength, although they may display or rely on the DC voltage to power the device.